
A weak 12-volt battery can turn an ordinary morning into a stalled-car problem. It happens. AAA’s battery-care guidance puts a typical car battery’s service life at about three to five years, though heat, cold, and driving habits can shorten it. BCI’s 2024 Battery Replacement Data Book tracks replacement demand across the North American market, reflecting how routinely batteries wear out. A Car Battery Jumper can help restore power, but using one incorrectly can damage vehicle electronics or cause injury.
This guide explains how to choose a suitable jumper, inspect the equipment, and connect the clamps in the correct order. You’ll learn how to distinguish a portable jump starter from jumper cables, check the vehicle manual, and recognize warning signs such as a swollen or leaking battery. Small details matter. Many vehicles have designated jump-start points, and their instructions may differ. Follow the manual for both vehicles and the jumper; do not rely on a generic diagram alone.
The steps here focus on careful preparation, secure connections, and what to do after the engine starts. They are not a substitute for professional help when a battery is damaged or the cause of the failure is unclear. Even experienced drivers can rush a clamp connection. That is worth admitting—and checking twice.
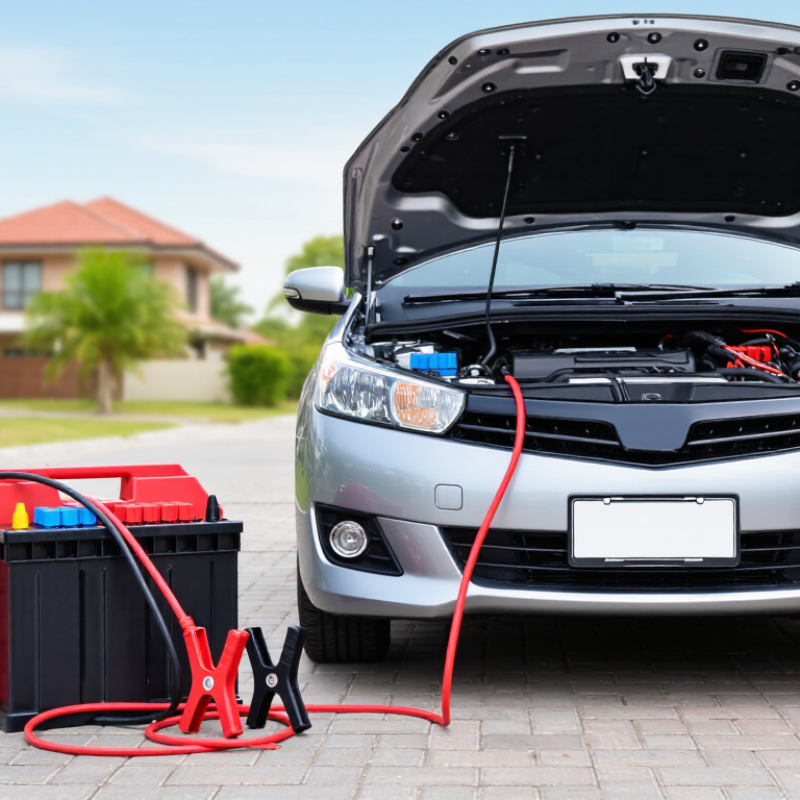
Most passenger cars use a 12-volt electrical system, so choose a jumper pack set to 12 V. Match the voltage before attaching clamps; a 24-V source can damage a 12-V vehicle’s electronics. Check the owner’s manual and battery label, especially if the car is a hybrid, has stop-start technology, or has been modified. “Passenger car” is not a guarantee. Some vehicles have separate jump-start points or specific procedures.
Park safely, switch off the vehicle and jumper pack, and keep metal tools away from the battery terminals. Connect the red clamp to positive (+), then connect the black clamp to the designated ground point or negative terminal, as the manual directs. Check the markings twice. Don’t guess. Follow the pack’s instructions for switching it on and removing the clamps; the sequence can vary.
If the battery is cracked, leaking, swollen, frozen, or unusually hot, do not jump it. Get professional help. Stop if the pack signals a fault or the engine does not respond after a brief attempt. Repeated cranking can overheat cables. It may be tempting to try again, but that is not a useful test. After the car starts, have the battery and charging system checked; one successful start does not prove either is healthy.
| Vehicle Type | Common Electrical System | Jumper Selection | Important Checks |
|---|---|---|---|
| Most passenger cars | 12 V | Use a 12-V jump starter or a compatible 12-V donor vehicle. | Confirm the vehicle’s specified voltage and follow the owner’s manual for connection points and jump-start procedure. |
| Passenger cars with larger engines | Usually 12 V | Choose a 12-V unit whose starting-current rating meets or exceeds the vehicle or jump-starter manufacturer’s recommendation. | Engine size, temperature, battery condition, and engine type can affect starting-current needs; voltage alone does not determine the required capacity. |
| Light-duty pickup trucks and vans | Usually 12 V | Use a 12-V unit rated for the vehicle’s engine and battery configuration. | Some vehicles have multiple batteries or specific remote terminals. Check the manual before connecting clamps. |
| Hybrid vehicles | Often a 12-V auxiliary battery, in addition to a high-voltage traction battery | Use only the specified 12-V jump points and an approved procedure. | A jump starter is for the auxiliary system, not for connecting to or jump-starting the high-voltage traction battery. Follow the vehicle manual. |
| Battery-electric vehicles | High-voltage traction battery plus a low-voltage auxiliary system, commonly 12 V | If permitted by the manual, use a compatible 12-V source only for the designated auxiliary-system procedure. | Do not connect a conventional jumper to high-voltage components. Procedures and low-voltage system designs vary by vehicle. |
| Heavy commercial vehicles and some buses | May be 12 V or 24 V | Match the jumper’s output voltage exactly to the vehicle system. | Never connect a 12-V source to a 24-V system, or a 24-V source to a 12-V system. Verify the system voltage and procedure first. |
| Older or specialized vehicles | Can vary; some use non-standard or 6-V systems | Confirm the vehicle’s actual system voltage before selecting a jumper. | Do not assume the system is 12 V based only on the vehicle’s age or appearance. Check the manual or consult a qualified technician. |
| Any vehicle with a damaged, leaking, swollen, or frozen battery | Voltage may vary | Do not attempt a jump-start. | Stop and seek qualified assistance. A damaged or frozen battery can present a risk of fire, explosion, or injury. |
A car battery’s CCA rating describes its cold-starting strength, not its total energy storage. Under the SAE test, a fully charged battery is cooled to −18°C and discharged for 30 seconds. It must maintain the specified voltage during that test. For a typical 12-volt lead-acid battery, the threshold is 7.2 volts. Cold bites.
This test matters because engine oil thickens in winter, making the starter work harder. When choosing a jumper, compare its starting-current rating with the vehicle maker’s recommendation. A higher suitable rating can provide useful headroom, but it does not repair a weak battery. CCA is also different from amp-hour capacity, which describes stored energy over time. Easy to confuse. I’d check both the battery label and the vehicle manual, since labels alone can leave important details unclear.
Before using a jumper, switch off the vehicle and follow the device instructions. Connect the positive clamp to the positive terminal, then attach the negative clamp to the specified grounding point. Keep clamps clear of moving parts and confirm the connections are secure. Start the vehicle as directed, then disconnect in the recommended order. A CCA figure is a controlled test result, not a promise that every cold start will succeed. Temperature, battery age, and cable condition still matter.
A cold-cranking amps (CCA) test applies the battery’s rated CCA for 30 seconds at −18°C. For a 12 V battery, the commonly cited SAE pass threshold is 7.2 V at the end of the test.
Example profile only—not measured test data. The chart illustrates voltage under load for a hypothetical 600 CCA battery; compare actual results with the battery and test-equipment specifications.
Before using jumper cables, switch off headlights, climate control, audio, and other electrical loads in both vehicles. Put both vehicles in Park or Neutral, set the parking brakes, and follow their owner’s manuals. AAA’s 2017 battery study found that at 0°F, a battery can lose about 60% of its starting power while an engine may need roughly twice as much power to start. Cold-weather starts leave little margin for careless connections.
Connect one red clamp to the disabled car’s positive (+) terminal, then the other red clamp to the donor battery’s positive terminal. Attach a black clamp to the donor battery’s negative (–) terminal. Put the final black clamp on a clean, unpainted metal ground point on the disabled car, away from its battery and moving parts. Keep clamps apart. A small hesitation here is useful: check the symbols and cable positions again before starting. Never jump-start a cracked, leaking, or frozen battery; stop and seek professional help. Remove the cables in reverse order after the engine starts, keeping the clamps from touching metal or each other.
Park safely, set the brake, and switch off the headlights and other accessories. Check both the vehicle instructions and the jumper manual before connecting anything. Clamp order and activation steps can vary by model, so use the printed diagram rather than relying on memory. Check that the clamps are secure and correctly placed. Keep them apart once connected. A small mistake here can matter.
Activate the jumper only when its manual tells you to. Turn the key or press the start button for a few seconds, then stop. Long cranking attempts can overheat equipment and strain the vehicle’s starter. If the engine does not start, wait for the interval specified in the manual before trying again. Keep attempts brief. After a few unsuccessful tries, stop and reassess instead of pushing on; the battery may not be the only problem. It is easy to rush when you are cold or late, and that is exactly when careful checks help.
Tips: Watch for warning lights, unusual heat, or a burning smell. Stop immediately if you notice them. Once the engine starts, disconnect the jumper in the manual’s stated order. Don’t guess.
Once the engine starts, let both vehicles idle briefly, then switch off accessories such as headlights and climate control. Remove the clamps in reverse order from connection: black clamp from the disabled vehicle’s bare metal ground, black from the assisting battery’s negative terminal, red from the assisting battery’s positive terminal, then red from the previously discharged battery. Keep each loose clamp away from metal and from the other clamp. Sparks near a battery can be dangerous. Follow the vehicle manuals if their instructions differ, and keep hands clear of belts and fans. It is easy to rush this part; I sometimes have to pause and check which clamp is next.
A successful start does not mean the battery is fully recharged. Drive for around 20 to 30 minutes if the vehicle manual permits, but a proper battery charger may be needed for a deeper recharge. Short trips may not replace the energy used during starting. For a useful check, switch the engine off and let the battery rest before measuring its voltage with a multimeter; about 12.6 volts often indicates a full charge, though temperature and battery type affect readings. If the battery repeatedly goes flat, or the engine struggles again soon, have the battery and charging system tested. Don’t assume the jump solved the underlying problem.
To learn more about any of the products and services provided by Abbott Ball Company, Inc., simply complete the form below.